RE-New Threads TUESDAY!
*************************************
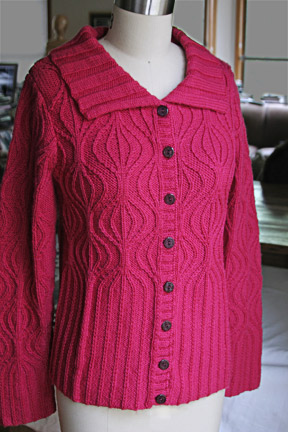
Give a girl a couple of days off the Hamster Wheel that is Life and all of a sudden! Things start getting done ;p
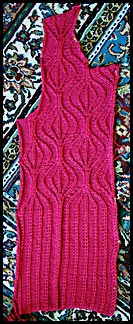
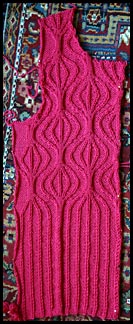
I finally finished the second buttonband of my cardigan from long ago (2004). This sweater was a Shirley Paden design from Vogue Knitting Magazine Fall 2002 (executed in Filatura di Crosa: 401) that I changed from being a turtlenecked pullover to a zipped-up collared cardigan (wherein I bit off more than I could chew — see mods below), and used a zipper closure which was w.r.o.n.g.
So wrong, I rarely wore the thing!
Now, like a little breath of Spring air (omg, it’s STILL 47° degree mornings here) I have a (re)New sweater to enjoy.
I love it. I love the color! I remember the day I bought the yarn, I walked right over to it which is only unusual if you’ve ever been shopping with me. Most will attest, to my embarrassment, I usually beeline any old chartruese yarn that fills the frame.
Not that day. It was Fuschia!
Perhaps the siren song I heard was from the Basin; I’d seen, in the many years I visited New Orleans in the early spring, the explosion of the Azaleas; the excitement of the Rhododendrons…
These flowering bushes have potent, saturated blooms, sometimes in the very color of le Cardigan!
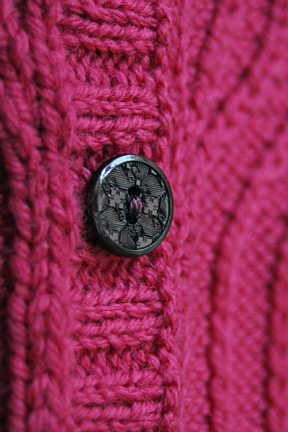
I also got to finally use some buttons that had been lingering in the basket since ’04. They are dark burgundy, with carved faces showing stylized petals.
From the Archives: the Neckline Mods…
the Original SIN
The original pattern was for a pullover with a turtleneck. First of all, pullovers made from wool are out of the Chic Knits repertoire because they cannot be thermostatically controlled like a cardigan. Our North American residences and business are usually overheated and if I can’t get some air in the mix, I’ve found I probably will rarely wear the garment.
So, a cardigan it became.
AND, the turtleneck had to go because it wouldn’t work with the new idea. This neckline was going to be fresh and a little naughty and I envisioned it with a large portrait collar emanating from a rather low scoop neck…
YUM…
So, I set to shaping the neckline at a point determined by measurement and where a pattern repeat would make it easier.
Good solid logical thinking.
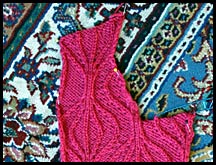
What I did not do properly the First Try was the shaping. You can see how angled and sloppy the finished product is:
the Brainstorm
I could not just let this alone. I was playing with another sweater design – very different – but similar in the fact that it too, needed a scoop neck.
Well, my usual neck shaping is *Bind-off xx stitches at the neck edge, then DEC 1 st at the neck edge every other row…*
BLAH, Blah, blah…
A versatile, simple neckline to be sure, but like everything in the world, ONE SIZE DOES NOT FIT ALL…
I needed a curved neck that had a gentle slope.
I needed ART!
Art School rears its Gelled Head…
What do you get when you cross Fashion Training with an Engineering degree? Why, a desperate need to solve the puzzle.
And I had the tools, I just didn’t know it.
After undergrad, I went Post-al and studied Graphic Design at the School of the Art Institute of Chicago.
And, as I considered the distorted wavy neckline, I remembered I knew how to draw curves in Freehand (from Macromedia) and Illustrator (from Adobe)…
So out comes the graph paper.
On goes an actual stitch count / row count of the front piece, with the selected dimensions I chose for the shoulder width, armhole depth and my shaping and the neckline drop.
I also added red lines every 10 boxes vertically and horizontally.
the Fun of IT!
Now it got very exciting for me because I realized it was going to be a game of connect the dots !
I drew a curve with the pen tool, that went from about 2" in from the front edge to the interior shoulder edge.
The ~2" was going to be the initial flat center of the neckline.
Then it would curve up to the shoulder.
Making my curve, I tried to hit the edges of the graph paper boxes to form a nice graduation. I didn’t want it to be too extreme or angled.
Quick Draw
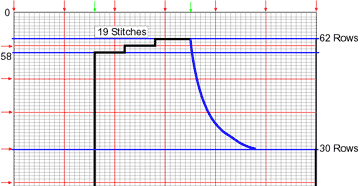
With the curve in place , now all I had to do was draw my stitches along its shape.
I made another line going across then up, across then up, hitting the curve wherever it intersected with a box edge.
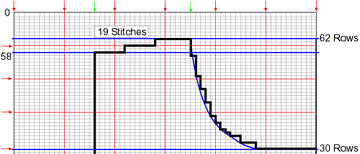
You can see, from right to left:
- Bind-off 12 sts at Row 30
- Work one row.
- Bind-off 3 sts once.
- Work one row.
- Bind-off 2 sts once.
- DEC one stitch at neck edge every row twice.
- DEC one stitch at neck edge every ALT row twice.
- DEC one stitch at neck edge every 4th row 3 times.
- DEC one stitch at neck edge every 6th row once.
Who’s the Boss
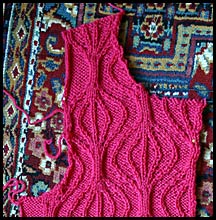
I printed out my new and shiny graph, frogged the nasty Right Front piece right back to the armhole shaping, and FOLLOWED MY NEW IMPROVED INSTRUCTIONS!
What did I get for all of my trouble?
An elegant curved edge :
No Software?
In my first Graphic Design course at SAIC, the instructor FORBID us to use computers at all. About a third of the class transferred to another section. I wanted to jump right in and get my hands dirty so I just kept on.
Somehow it was just emancipation to grab pencil and rubber eraser and go organic…
Fear not ! Just print out the graph paper and draw your curve by hand…
Get thee to thy local Office Despot or Wallgrins and buy thyself a CURVE!
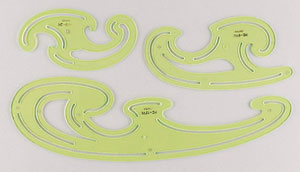
Whether you use a fabulous French Curve like the ones by ALVIN pictured above or the school supply verison protracter/curve I got at the Dollar Store for $.50 below:
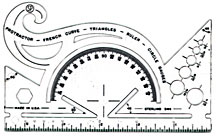
or even the edge of a bowl or plate, the results are the same:
You want to draw a nice edge outline that can be transformed
into the perfect neckline!






 Monday Morning Mirth
