knit it up October 11, 2012

actual knitting getting done…

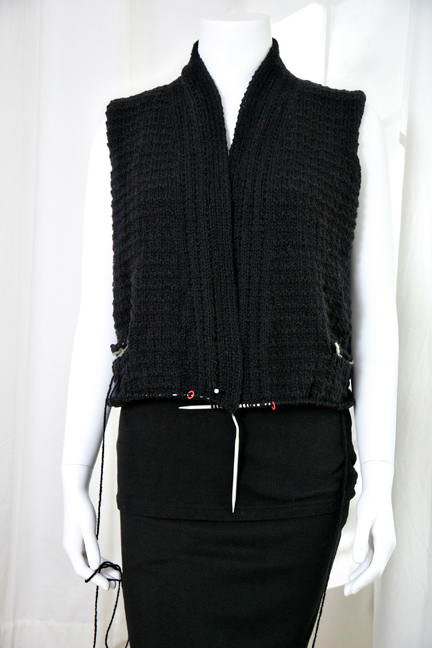
This was my traveling companion recently and has become the evening knitting. Finding a nice little lamp, focused on the moving stitches makes it easy to work on the dark yarn without going insane.

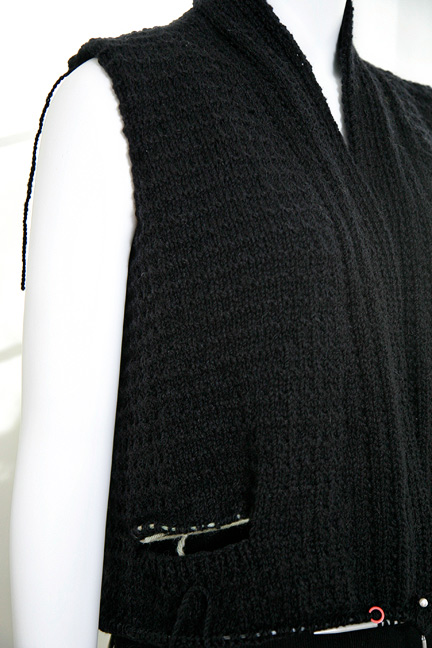
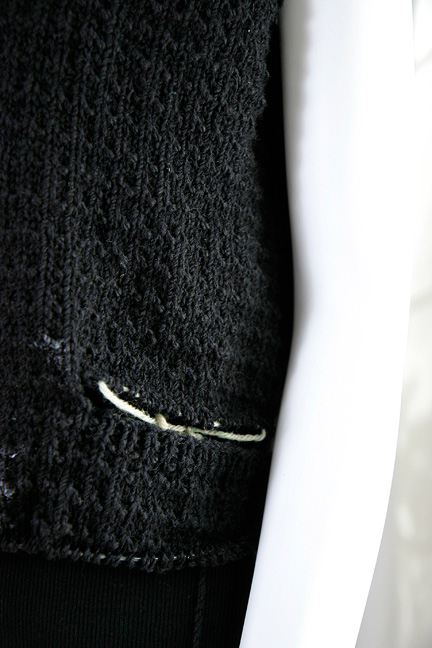
The texture is slightly amusing; the front band tickles me too.

Chic Knits UMA

This is UMA, made from the top down, starting with the Back shoulder line.

Then each Front is started at the back neckline with a Neckband and
then sts are picked up across the shoulder after the Neckband is to length.

The sections are worked to the underarm, where they are joined
and worked as one to hem.

I happily reached the Pocket Point last night — you put some of the stitches on scrap yarn to hold, cast on more sts for the pocket band, which is right in the body of the sweater.

Just a few more inches and this will be at the hem!

I had a lot of fun taking these pictures. I think.

It’s getting darker all the time out at the Little Cabin in the Woods (insert “omg October is almost half over!” here) and I’m determined to learn fill-lighting. Probably doesn’t help that my WIP is BLACK~! (and the curtains white) but why start easy?!.

[Anything to avoid P.A.C.K.I.N.G.]

The more the merrier… April 12, 2012

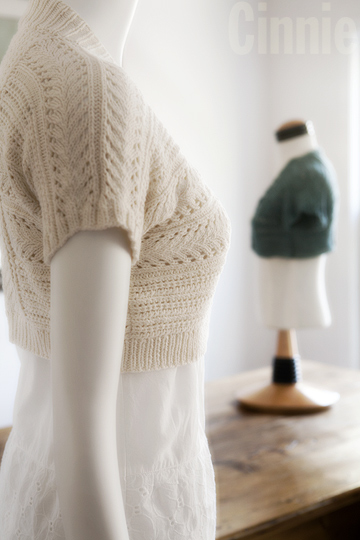
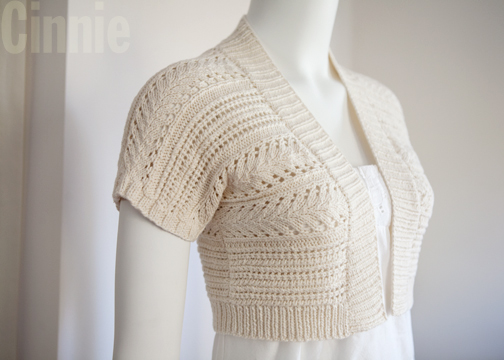
Chic Knits Cinnie

One of the best feelings out there: finishing a project.

One of the worst feelings out there: ditto.

Que? When said project is in your face (photos, styling, detailing, etc) because that garment has been preordained to be a sample and You can’t wear it. (And it’s a good thing it’s not your size because, yea, it would be preempted. But so aggravating!)

Lucky for me losing that post-pro envy is as easy as picking up the needles and starting one for myself!

Here’s my CINNIE that I’m making using some Silky Wool in a gorgeous color they call: Verdigris.
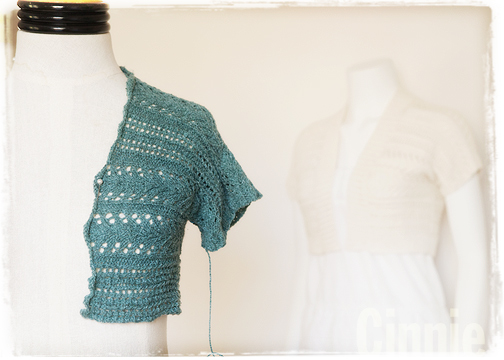
Chic Knits Cinnie

I’m at about half done with this one, a cropped version, that is going to pair with a brown linen sheath-type dress I have…

The whole Cinnie adventure started because I, like many of you, live in a place that has incredibly schizophrenic weather (ie. the “Wait-10-Minutes-and-It-Will-Change Zones). I winced thinking of all the upcoming weddings, proms, garden dates, concerts, etc. all populated by lovely ladies shivering and bunched up trying to ward off the evil chill.

Who isn’t sick of goose fleshy upper arms (which, imho, might not be ready-for-prime-time on all occasions anyways); weary of being in a restaurant or at the movies when suddenly attacked by some rogue air conditioning; bored by having to guess which way the wind is going to turn (it’s Chicago! It’s everywhere and it’s going to smack you down (then snicker)!)!

Not this knitter. Get up with the needles and on with some style!

My fascination with no-sew construction led me down a newer path this time. CINNIE has some side-to-side knitting that is fast and fun to do. I’ve become a huge fan of what many refer to as a modular knitting where stitches are picked up on already worked areas then continued to make another area of the garment.

Picking up stitches is one of the most wonderful techniques to develop and master. It’s used on almost anything you can think of and once you get going, it is fast and neat. My friend Eden was over the other day and we were enjoying some tea and afternoon knitting and she asked me to show her how to do it.

If you’ve been visiting here before, you know I’m a huge fan of Hands On knitting lessons – and this was so satisfying! Within less than 5 minutes, Eden was picking up stitches as if she’d been doing it for years! Being her friend, I gave her the opportunity to practice on a sweater I was making (and, hee! saved myself a little time because I didn’t have to do it myself. Sneaky.)

I love it so much I’m tempted to start “sewing” my knitting together by combining that technique with a couple others.

But in the meantime, I’m really enjoying my Cinnie knitting with this to egg me on…
Chic Knits Cinnie Hand Knitting Pattern

Almost There August 26, 2010

Getting ready for a trip out of town can sometimes be a frenzied task, especially when it includes Knitting Projects To-Go.

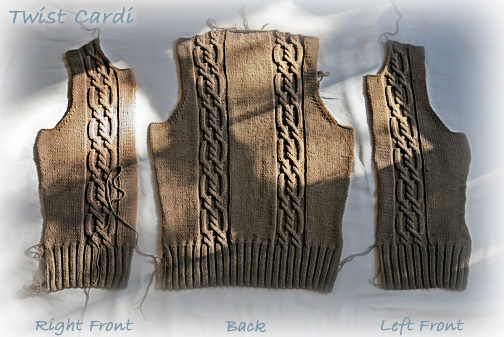
I’m trying to wrap up and prepare a couple of goodies to take up north to Michigan. Here’s my Twist cardi ready to be seamed, then hooded. I’m hoping to do all the seaming and buttonbands once I land in the country (visualizing now sitting on the porch swing, ribbing…)

twist_9775

I set it out flat like this so we could see a wonderful phenom characteristic of piece knitting.

Here you can see that the side edges and armhole edges of the Front pieces mimic the Back.

How do they correspond? Taking a look you can see:

The Right Front has the same shaping as the Left Back Edge.

The Left Front has the same shaping as the Right Back Edge.

From the Chic Knits Archive:

How to continue and match the pieces of a sweater? Like many of you, I make a working copy of the pattern then do Mark-Up. In the margins, I keep track of rows in various places (length of ribbing, length to underarm, length to shoulder, total length, etc) as reference points for the entire sweater.

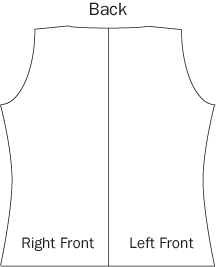
If you notice, sweaters knit in pieces already have this functionality built in. They usually start you out with the Back Piece first. Here you will find the Rosetta Stone for the Fronts. Many times, knitters email me with shaping questions about cardigan construction and I always refer them back to the Back.

Now, this requires a slight leap of imagination, because the Back, as is, is the Mirror Image of the other pieces and not the doppelganger…

All of the shaping information one needs to make the Body and Armhole areas of the Fronts are already accomplished on the Back.

So, if a pattern gives instructions as: “Continue as for Left Front, reversing all shaping. Substitute SSK for K2TOG and vice versa as needed, using Back piece for reference, as needed”

Spread the Back piece out and read it like a map! :)