![]()
v.1 How to Join Sweater Pieces to Knit in the Round using Two Circular Needles
Lately, I’ve been updating and sprucing up the Chic Knits site and it’s been a lot of fun to travel through its archives. There’s over a decade or so of blog entries wherein are many knitting tips and techniques that I still refer to for my personal knitting and when helping knitters who write to me about their Chic Knits projects. But they are hiding deep within the “stacks”. :)
Since it’s Throwback Thursday around the webz I thought it would be the perfect time to kick off the first in a Tips compilation section I’m starting to put together to have all these tasty morsels in one topical place…
First up? A Technique for Bottom-up Knitting with a Raglan Yoke.
Although there’s a lot of patterns out there for Top-Down (TD) knitting, Bottom-Up knitting is still a great technique for sweaters that incorporate stitch patterns or colorwork that is just too complicated to try and design top-down (don’t ask)…
In fact, it is still a very common, popular way to quickly knit all kinds of sweaters, both raglan, set-in and saddle.
The downside? Instead of having one large yoke piece like a TD, you first knit the body and both sleeves to the underarm and then join them altogether to form the yoke.
 Problem is that the first few round/rows of the newly fashioned yoke can have some “tight spots” where the pieces meet each other, making it an awkward knitting experience.
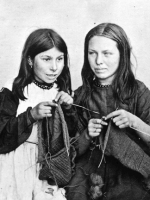
Over the years, I’ve wrestled with those rows and decided to just relax and try something different! I saw this sweet vintage picture by Lewis Harding (1870’s) of two friends knitting in the round using super-size metal “pins” and it dawned on me I could do this too.
The knitter on the right (click for larger image) appears to be knitting a sleeve and the knitter on the left seems to be knitting a tube from the bottom up. It’s their pins that caught my eye: they are not entirely straight but more like circular needles. Now this is probably from the torque the knitting put on them but it planted the seed in my brain all the same. :)
Being blessed by a large “library” of circular knitting needles it was one small step to use them in another way – if socks could soar, why not a Sweater?
++++++++++++++++++++++++++++++++++++++++++++++++++++++++++
Knitting Tips: How to Join Sweater Pieces to Knit in the Round using Two Circular Needles
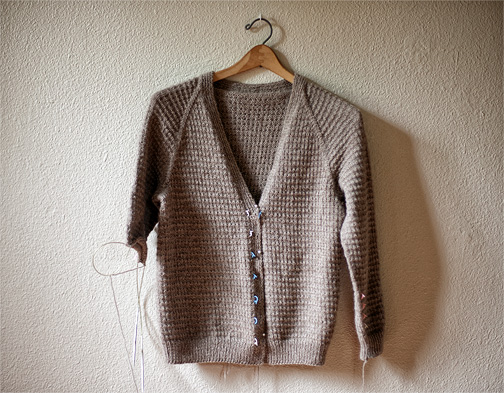
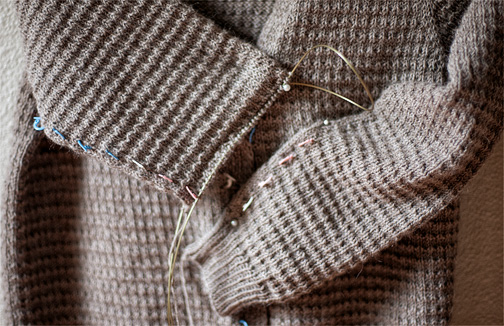
When making sweaters in the round from the Bottom Up, I like to use two – medium-long circular needles to knit the body in-the-round (same concept as socks just many more stitches). Then, when it comes time to join the sleeves to the body to make the yoke, I distribute all three pieces’ stitches over two longer circular needles.
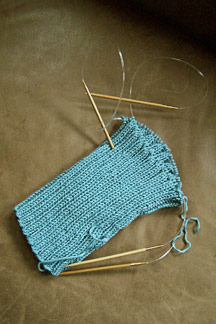
You need 2 – longer circular needles in the same size as you’ve been using for the body of the sweater. First, I put half the sts of sleeve #1 on needle #1 and the other half on needle #2.
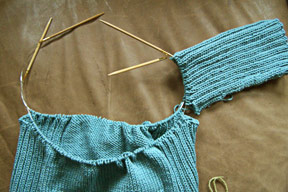
Making sure I have the under-sleeve facing the underarm of the body of the sweater, I then slip one-half of the body sts to needle #1 next to the sleeve sts already there. Then I align the under-arm of Sleeve #2 with the underarm area of body section and slip one half of its stitches onto needle #1 next to the body sts. So it’s: 1/2 sts sleeve #1, 1/2 of body sts, 1/2 sts sleeve #2.
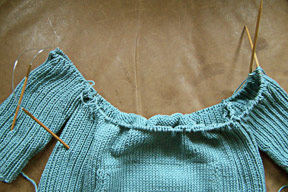
Then the Back section and the other half of the sleeve stitches are distributed on the second needle in the same way for the “back half” of all pieces.
That’s it! Now those naughty large amounts of stitches are spread out over two needles, making it really easy to manage the bulk. This also eliminates the *squeeze effect* you get if you use one long circular (where the joins of the pieces are tight and awkward to work).
Smooth. We like…
…edited & refined from an entry from March 4, 2008
++++++++++++++++++++++++++++++++++++++++++++++++++++++++++
Find all of Chic Knits Knitting Tips HERE…
