Knitting Tips & Techniques – June 5, 2014

Knitting Tips: Chic Knits Knit Blog
v.4 Replacing Stitches Held on Scrap Yarn Back on Working Needle…

While I’ve been working on the longer version of the ABRIA cardigan, several of my favorite (and really useful) techniques have been in play.
Chic Knits Abria Cardigan Knitting Pattern

So far:

  • Provisional Cast-On (my fave? a Chained PCO!)
  • Slipped Edge Sts
  • Pick-Up-and-Knit (will be teaching a workshop on this soon at the Friends & Fiber Retreat)
  • m1L and m1R (slanting, low-profile directional increases)
  • Slip stitches to scrap yarn to hold
  • Replace held stitches back on working needle

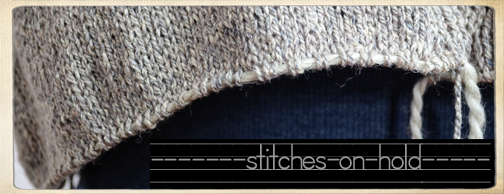
After putting the Abria body stitches on scrap yarn to measure its length in the last session, it was time to do the technique last on the list above: replace the stitches held on scrap yarn back on the circular working needle so I could keep knitting.

From my casual, non-scientific chats with other knitters, taking live stitches off the needle like this, especially when it’s a large number, is something that many avoid like the plague! But when making no-sew garments (top-down sweaters we’re lookin’ at you here!) unless you are willing to resign yourself to living in sleeve-less sweaters (v.e.s.t.s.), there’s going to come a day that you are just going to have to Do It.

It’s been my experience, that in the long run, if you just jump right on it and get the Fear Factor out of the way, just like when you decide to RIP off that band-aid, most of the time you’ll find that there was very little to be afraid of!

Awkward? Yes.

Difficult? Not really…

Time Consuming? No – once you’ve done it a couple of times, replacing stitches from scrap yarn to a needle goes really FAST.

It is especially fool-proof when you’ve used Scrap Yarn as your Holder. :)

Secret Sauce: you do not have to remove the yarn while you replace the stitches! You just use your working needle and poke it through the center of the loop of the held stitch while the scrap yarn “lurks” behind that stitch.

Here’s how it works (and please excuse my Minnie Mouse voice! My little in-camera mic is wonky.)

That’s all there is too it!

Here’s my longer ABRIA ready for its sleeves…
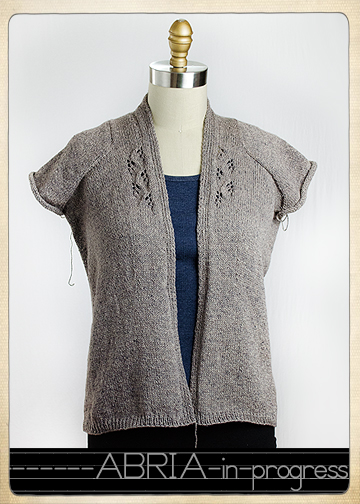
Chic Knits Abria Knitting Pattern

+++++++++++++++++++++++++++++++++++++++++++++++++++++++
find & follow CHIC KNITS on PINTEREST

Monday Muse June 2, 2014

Chic Knits Knit Blog

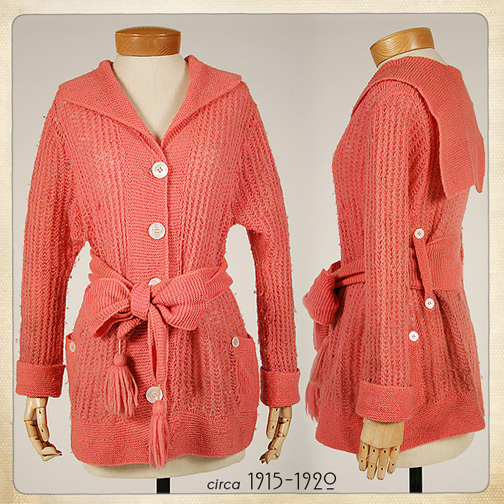
…when I heard this month that the Met Museum was releasing a colleciton of digital images I couldn’t wait to to browsing…

One of the first things I found? A Downton Abbey era sweater – one of the first non-male cardigans that some fabulous chic woman wore circa 1915-1920.

Love the styling and the POP of spring color — it’s as fresh almost a century later as it was on Day One…

++++++++++++++++++++++++++
find & follow CHIC KNITS on PINTEREST

Knitting Tips & Techniques – May 27, 2014

Knitting Tips: Chic Knits Knit Blog
v.3 Using Scrap Yarn to Aid Measuring…

Many of you have asked about a longer version of Chic Knits new Abria pattern and I’ve been working on a sample (made in Silky Wool) to test out some shaping mods…

Lots of progress was made this weekend and I added a few inches to the original length and at the same time, added stitches to the body of the piece.

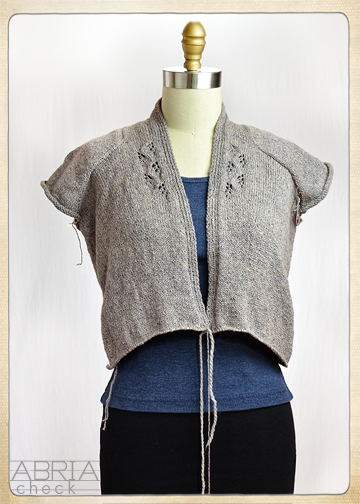
The general plan? Everywhere the pattern said to do an underarm decrease, I instead did a paired increase. This now gives the cardigan a slight swing shape; but to be sure it was time to go up on the Studio Chic mannequin and give it a real-time inspection. (No fit mannequin? No problem – lay out flat on a table and do the same checks as below…)

At first, I slipped about half the stitches to a spare circular needle so the stitches were split between two needles. Although this works in a pinch pretty well, this time it just flared out dramatically (the needle cables were too stiff) and it didn’t really give me a honest perspective on what was going on with my mods.

So, it was time to try a little tip that requires a small time commitment but really lets you go forward with confidence about your progress.

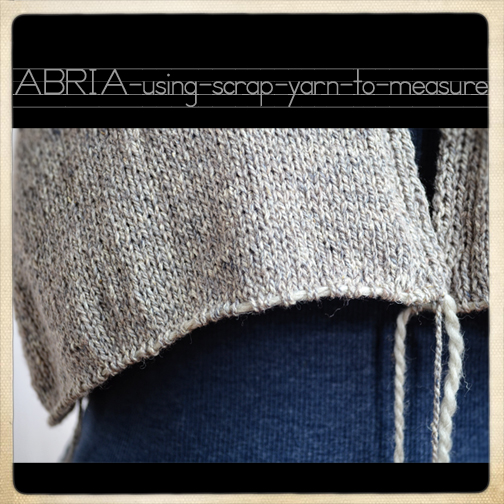
Knitting Tips: How to Measure a Sweater Using Scrap Yarn

To get a flatter manageable edge, I slipped the stitches off the working needles onto yarn that’s a little larger gauge than what I’m knitting with. The bulkier yarn aids in preventing bottom rolling.

Then I moved and slid the stitches around on the scrap yarn to be as evenly distributed as I could to create and edge without as much flare or flip as I could.

Chic Knits Knit Blog

Now, keep in mind, this is un-blocked fabric and might still pucker a little and not look 100% perfect, but overall, it is a nice and relatively easy way to get accurate dimensions established. I can see that my shaping is working and I can go on finish the body section knowing I hit the goal I was shooting for with my mods.

If you prefer a smoother appraisal, take a page from sewing techniques and steam press the garment in-progress and then take your measurments.

This is also the perfect time to Try On Your Sweater! Take advantage of one of the best reasons to knit garments from the top-down to see if your fit is meeting your expectations. I also laid my sweater flat on another sweater that fits me really well to get even more fit information.


…Next: putting the stitches back on the needles? No fear – it’s easy…