If there’s a windy windy rain storm going on outside,
the best thing to do is get cozy,
then get busy…
Today in Portland, after bundling up in some comforting wool, I got to it.
I’ve been finished knitting my 4th ALBY shawl for quite awhile but have been putting off blocking it because, ew, blocking.
The first three Alby’s that I made were blocked upstairs in the attic – on the carpeted floor. This was the biggest area I could find that wouldn’t be disturbed while the shawls dried to measure.
Several times during the mulitple blocks, I felt time stand still – had to keep pinning and re-pinning, all while crawling around on the floor. Torturous.
{hint: don’t wear skinny jeans while doing this – heh!}
It seemed to just go on and on and on, like my own Personal Ground Hog Day, Shawl Style.
Never again, I vowed.

This time around, while I was soaking the shawl, I did a little more surveying around the house looking for someplace I wouldn’t exhaust both my back and my patience.
Solution?

The dining room table.
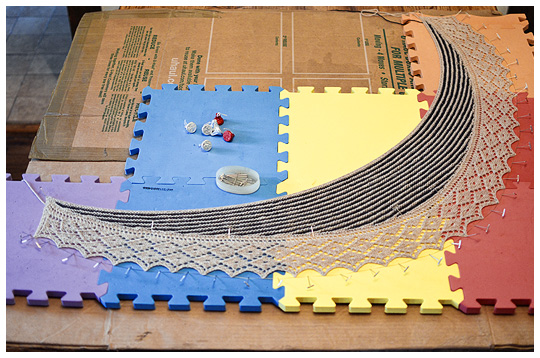
Evolution: the very first surface I used to block on was a big cardboard box that I’d flattened. I thought it would be good to pin into and protect the carpeting. By the time I got to Shawl #3, I’d quit fooling around and was now the owner of a rubber play mat made of interlocking pieces that you could build-to-size for any blocking project.
Why not combine the two to protect the table AND be able to walk around the entire thing while shaping and pinning…
VOILA!
Handy-Dandy Shawl Blocking Tips:
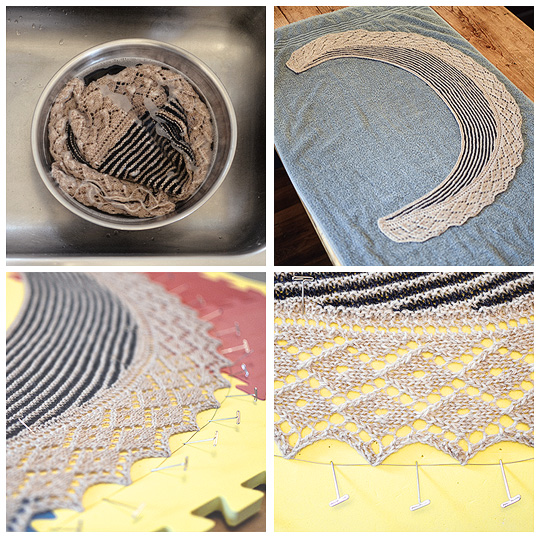
clockwise from l. to r. Upper Picture
- Soak the shawl in some warm, slightly soapy water for about 1/2 hour, then rinse.
- Place out on a towel in general final shape then roll in towel to remove excess water. I find this “pre-shaping” trains the fiber to want to go into the blocked shape more easily.
- Remove from towel and place on blocking surface in final shape, anchoring with a few T-pins to match pattern schematic dimensions. Thread blocking wires through outside edge then start pinning out points.
- Adjust as necessary so all points are as equal in size as possible and no stress or mis-shaping is appearing on other areas of shawl.
- Let air dry.
But wait, I forgot something – here’s the real secret to my success…
Can’t wait for this to be ready to wear – it is made from some very lovely comfy yarn – Bare Naked Wools Breakfast Blend Fingering (in Oatmeal) and Araucania Ranco (in Navy). perfect to Mind the Gap I’m feeling inside here today. :)

