I love to Knit SOCKS!

This time of year is one of my most very favorite. Yes, there is some really nice 70-ish weather going on in Portland, but there’s something else tickling the knitting fancy here at Studio Chic.

I’m back to sock knitting!

Like I’ve told anyone who’ll listen, if I had my druthers, I’d just knit socks all the live long day.

Yes, plain stockinette socks, the ones where the rounds just repeat over and over and over…

They are my mind candy, my yarn happy-hour cocktail, my oasis…

After a beautiful trip teaching at the Cordova Gansey Project in Alaska the last part of June, I came home to a little calm-before-the-storm time frame between design deadlines.

I brought home with me a sock I started using yarn from the Net Loft, in the Salmon colorway. It was my lovely perfect companion while I was so near the Copper River there, where the wild salmon spawn, and it is now my reminder of how much I love that area and its people.

This happiness of knitting on the road re-started my love affair with The Sock and I couldn’t wait to go, where else: stash diving! when I got home to Portland.

During last few months, I’ve winnowed out and organized my yarns and I’d put my nice (and seriously large) collection of Sock Yarns into their own space.

So I started digging and gathering and herding up all the orphan one-ups I’d had started and abandoned and was pleasantly surprised to find some finished ones:
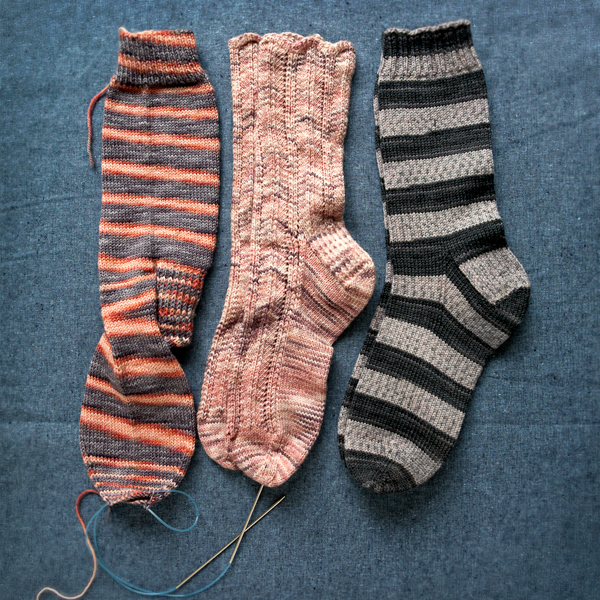
SIP-2192-600
from l. to r.: my Salmon sock-in-progress, a finished prototype, a regular loved pair

Not so pleasantly surprised to find: not all the socks were the same size!

Since I haven’t been knitting socks for awhile I forgot something I wrote about in 2003:

• Not all same circumference needle sizes between manufacturers are consistent

• Not all sock yarns are created equal – even though they may be marked as “fingering” weight.

This invigorated me (instead of annoying me like it had done long ago – ahhh – maturity).

SO, now that I had a bee in my bonnet, I put together a pile of yarn I was most interested in using in the near future and did what any self-respecting geek would do: I made a DATABASE.
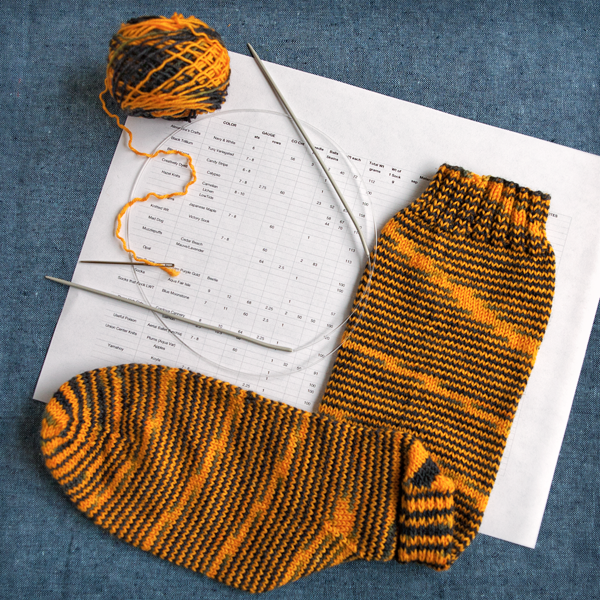
Chic Knits Knit Blog

This lovely table includes all the weight and yardage information about the selected skeins (some of which were wound in two or more balls and completely off the grid) and something I hadn’t paid attention to before, yardage per gram and weight of one finished sock.

Doing this enables me to determine the proper needle size and cast-on stitch count I need to get a properly proportioned sock. I especially like keeping track of the weight of a single sock, for reference now that I have a nice little Escali scale.

All my socks should all be the same size, yes?

Now I can “knit on in confidence” knowing my knitting is going to produce the right results.

Priceless…
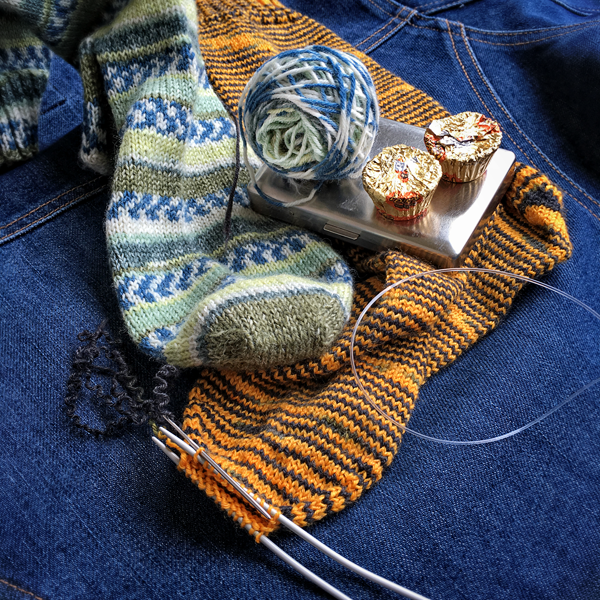
Chic Knits Knit Blog
>>>> this recently kitchenered sock was started in 2007 and kitchenered July 8, 2016. Two more socks are ready to be grafted which requires fueling with miniature peanut butter cups, but of course…
How to Estimate Yarn Used in Knitting – Part I

Even though it’s evident that cabin fever is rapidly rampaging into full-blown spring fever here at Studio Chic, the temperature reality of the Pacific Northwest is in what is know as February Fake-out.

During the day, in the sun, there can be a feeling that something is indeed sprung, but in the shade or once the sun goes down, I am still reaching for my toasty woolies…

And I’m still on a top-down Stockinette Stitch bender! My lovely natural “black” Cormo sweater is blocking (pictures soon), and I’ve started another deep-stash project.

This time out, I’m designing a top-down, chunky (4st/in) gauge sweater that I hope to wear gardening and hiking in the woods.

Chic Knits Knit Blog

The Yarn: Rowan Scottish Tweed Aran that I’ve had forever – now discontinued – which is a really rustic, beautifully colored fiber in a deep navy popped with white, grey & cobalt nubs.

The Problem: the receipt from years ago (wow – 2008) says I have 8 balls, but I can only find 7. Hmm… This is a wrench-in-the-works because the comfort zone of my project has just evaported into the chill late winter air.

I want to make a size slightly larger than I normally wear, for comfort and to accommodate the larger gauge, with a length of about 29″, pockets AND a generous shawl collar. But do I have enough yarn?

WHAT TO DO?
Well, first of all, I just had a pretty successful outing with my Cormo sweater, another project where there was a challenge (unknown skein yardages), and I’m ready to
Take It To the Next Level.

(Who said knitting isn’t dangerous?)

The Plan
While working my mystery yardage Cormo sweater, I worked segments of the sweater, putting some areas on hold partway through their creation (the Body) and then knitting other important segments (the Sleeves). I knew I had enough yarn for an entire sweater but I wanted to make its Body as long as possible. The sweater had a built-in button band, so once the Sleeves were complete I could confidently just knit the yarn until it was gone.

My guesstimates for this new project is that it will take 4 balls for the Yoke/Body; 1 ball for each Sleeve; and 1 ball for the Shawl collar & bands, which is not built-in but worked last. Oof…

But here is a plan I think will allow me to knit and pause and change segments to carefully try and ration my yardage successfully:

1. Yoke
2. Body (for one ball after Sleeve divide – then put on scrap yarn to hold)
3. Sleeves
4. Complete the Body
5. Collar/Bands
6. (optional) Pockets – either patch or afterthought depending on leftovers from 1-5

Working this way, I could track the yarn usage and adjust #4’s length to make sure I could at least complete #5.

First Things First
Since starting to bake serious sourdough bread, I’ve acquired something no kitchen (or knitter) should be without: a inexpensive scale.

This tool will be the keystone to figuring out if I can bring my project to the finish line.

It will enable me to find a basis to keep track and distribute the use of the actual balls I have across the garment.

What information does the scale help discover?

Well, the most important: how much length is used per weight.

With that data, and the given yardage put-up of the yarn, one can figure out how much area and length you can expect to get from each ball and scale its usage accordingly.

Quick Math
This particular yarn has 186 yards per 100 grams.

Bringing this into U.S. standards of measurement of inches/oz means, using straight algebra where 100g converts to 3.523oz

3.523oz / 186yds = 1oz / x where x is the yardage per oz

OR more directly – all this means is you divide the yardage of the ball by its weight:

186/3.523

So: each ounce of yarn has about 52.8 yards

Start it Up
Now a more sane person might’ve taken this one step further, and if you’re interested in really understanding the A-Z of this, I encourage you to try this: make a large swatch and keep track of stitches and rows worked at your desired gauge.

Then: weigh the swatch, and divide it by the number of total stitches made (stitches per row TIMES number of rows worked).

This will give you the length of yarn used per stitch, which can be a very useful piece of information in this process.

But because I’m an adventurer, I just cast right on and I am going to keep track of the number of stitches worked on the Yoke as I go through the first ball of yarn (with pencil and paper), using the same concept as above.

Doing this, I find that I am using approximately 1″ of yarn for every stitch worked. Sweet! An easy nice number! I will call this data into play later on in the garment.

Now the second ball of yarn I’m using takes me through the Yoke divide (where you put the Sleeves on hold in top-down construction) and now the Body is basically a rectangle and it’s very easy to keep track of that important “stitches worked” count.

My initial estimate of 1″ per stitch checks out again and I put the Body on hold and start working the first sleeve.

The Payoff
My most scary segment of this design is the Shawl Collar/Bands. It is the hardest to guesstimate area and yardage. The longer I make the sweater, the more yarn it will take to band it.

I’m hoping to gain a little more confidence by completing the Sleeves and having a little leftover yarn for insurance. Eyeballing the Body section I’ve worked already also helps – I can visualize the collar/bands within its area and know it’s probably going to take at least a ball.

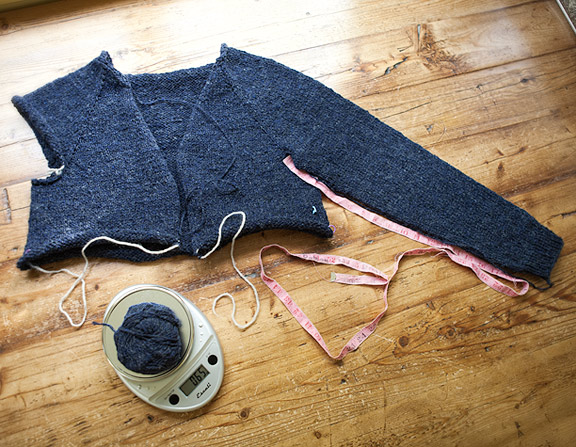
After I’m done with the first Sleeve, I now go back to my scale and weigh the remaining yarn.

Chic Knits Knit Blog

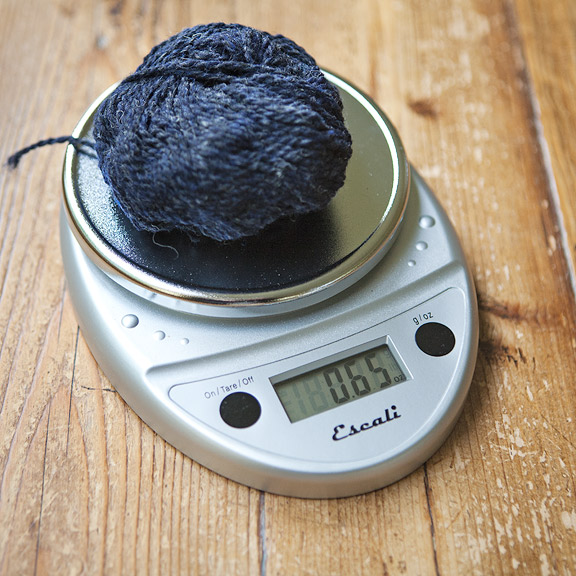
The leftover ball weighs .65oz.

I know I have 52.8 yards per oz – so that’s about 34 yards.

So, from the two sleeves, that means I’ll have 68 yards extra.

BONUS!

On to Sleeve Two.

…to be continued – stay tuned…

How to Lengthen a Finished Bottom-Up Knitted Sleeve

While working on my lovely *black* Cormo Cross sample sweater, I reminisced about another deep deep expresso-colored cardi that was in my wardrobe. Although it was made from some of my favorite fiber (Jo Sharp DK), it was sadly, languishing on the shelf.

In fact, I couldn’t remember the last time I wore it!

What would make me shun such a lovely sweater? Well, one of the characteristics that made me love the yarn also made me avoid wearing that style.

The fabric that this yarn produces, at a DK gauge, is very dense. This results in a garment that is also dense, thick and WARM.

Now, I can hear somebody asking, “Really? When has a sweater being warm ever been a bad thing? Isn’t that the point?”

Well, sort of…

This particular style has 3/4 length sleeves.

So, while enjoying the sweater during cold, cold weather, the torso receives a nice COZY HUG while the lower arms are conspicously suffering a CHILLY POKE from the uncovered area, almost elbow to wrist.

Loving this yarn really got me going though, when I remembered, having recently moved, that I had packed a couple of small balls of it in my stash. Would I have enough? I weighed them and decided to go for it, it seemed OK! Why let this lovely sweater go to waste?

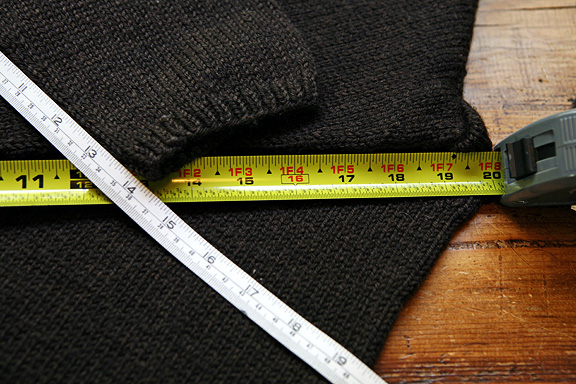
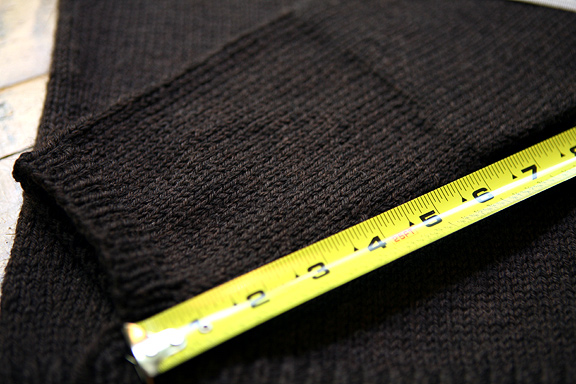
The Goal: lengthen the 3/4 sleeve measuring 14″ to my preferred long sleeve length of 19″…

Chic Knits Knit Blog

Here’s how I did it:

PICK UP STITCHES FOR NEW SLEEVE PORTION

These sleeves were knit in the round, but from the bottom up! So it wasn’t possible to frog the sleeve from the ribbing and add some length. If you’ve ever tried this (I did in my early knitting days – whoa!) you know that the stitches are completely intertwined in a way that requires you to pick them apart one-by-one instead of just *un-zipping* them if you want to free them up. So, I was going to have to first replace already worked stitches either on a needle or scrap yarn and then CUT THE FABRIC. Yes. Thrilling.

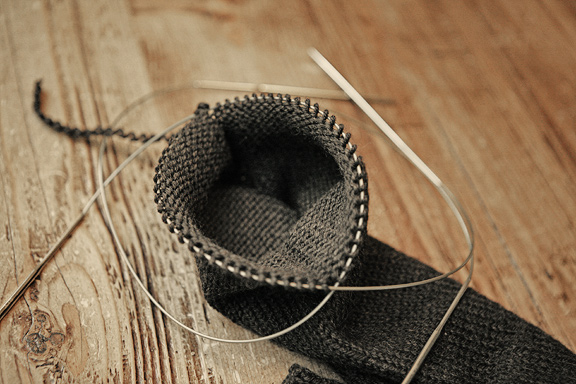
I like to knit in-the-round with two circular needles on larger tubes so my plan was to pick up half the new stitches on each needle and go from there.

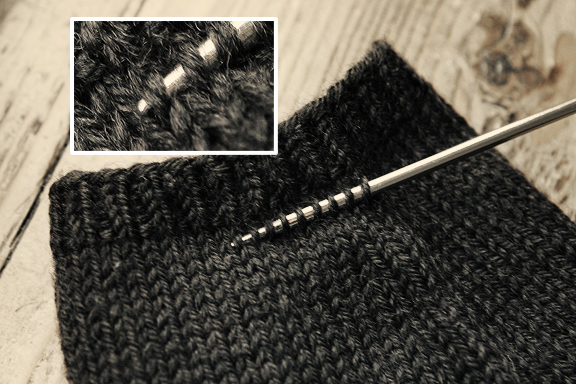
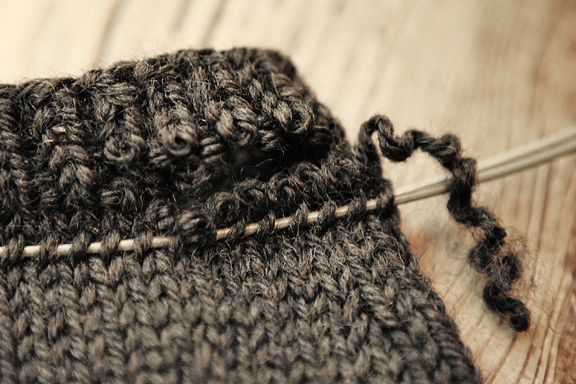
Starting one row down from the ribbing and using the tip of one needle, I picked up stitches through the next row, entering the stitches on their right side, from the rear of the stitch. The first stitch picked up was the one I thought was the closest to what was the beginning of a round of the original sleeve.

Chic Knits Knit Blog

This puts the stitch in the exact correct alignment to knit it later without twisting or re-positioning.

CLIP FABRIC AND RELEASE STITCHES

After I placed the entire row of stitches on the two circular needles, I made a snip near the start of the round, on the first ribbing row.

Chic Knits Knit Blog

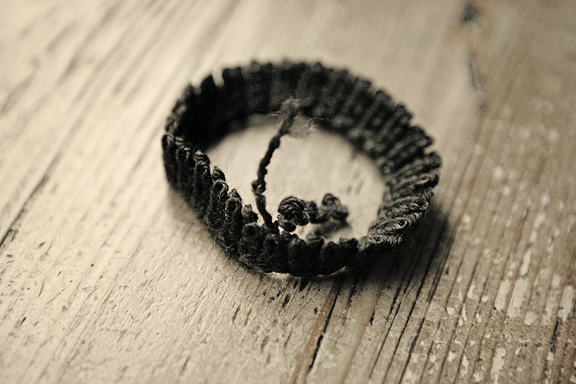
Carefully, going slowly, I pulled the tail of the yarn through the ribbed stitches, all the way around.

This leaves a row of “live” stitches above those being held on the needle. Why do it this way?

I’ve found it’s easier to find and fix glitches if you’ve accidentally gone one row up (or down) through the fabric while picking up the stitches.

Once all the stitches are un-picked, it’s then easy to frog that row and have a nice tail of yarn to attach to your new working yarn

Chic Knits Knit Blog

leaving the old ribbed cuff, standing by, if need be for extra yarn…

Chic Knits Knit Blog

KNIT THE NEW SLEEVE SEGMENT

I started knitting the new sleeve segment with the smallest ball of yarn and luckily, had a few yards left when I was finished with my new sleeve! (To shape the sleeve, I roughly followed the shaping instructions for the original, substituting a decrease for every scheduled increase.)

If I had been close to running out of yarn, I would subtract the weight of the 1st ball used from the 2nd ball. Then I would divide the remaining weight of the 2nd ball in half and wind off a portion weighing that much, to finish on Sleeve #1. This leaves the right amount for Sleeve #2.

Chic Knits Knit Blog

Now all that’s left is a nice wash and block and

VOILA! Now I have a comfy deep expresso cardi to wear and tide me over until that sample is finished! A girl can NEVER have enough yarn or sweaters, especially in such a yummy color!

Chic Knits Knit Blog

find all Chic Knits Knitting Tips & Techniques here