
Like many of the knitters I know, I have a dedicated bag that goes with me almost anytime I leave the house. I LOVE to knit in public.
Newest addition to it? Besides the current indigo WIP, along comes that apron I wrote about in the last post so my clothes stay neat and blue-free. I’ve been taking it all everywhere and getting lots done.
Captain Den-M-Knit approves! (Love love love this label!)
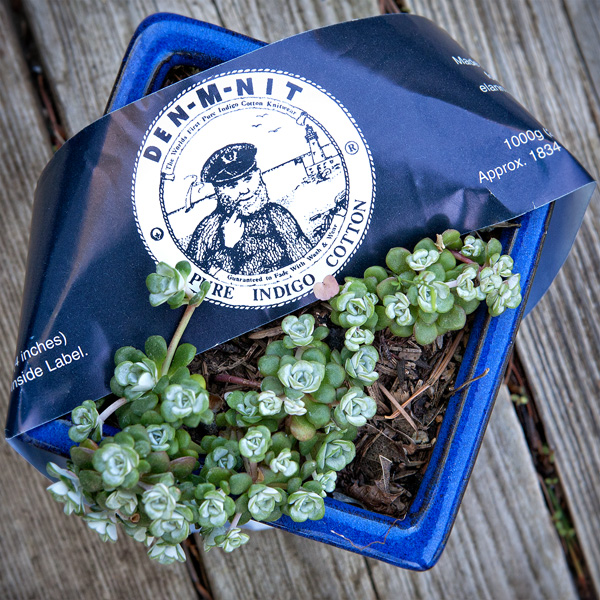
But why is the Captain sporting that little Mona Lisa grin?
Methinks he agrees that knitting with indigo yarn is FUN but maybe also that knitting in public at a place with dangerous treats is just redonkulous (even with an apron!).
To wit, witness this scene at my local coffee house
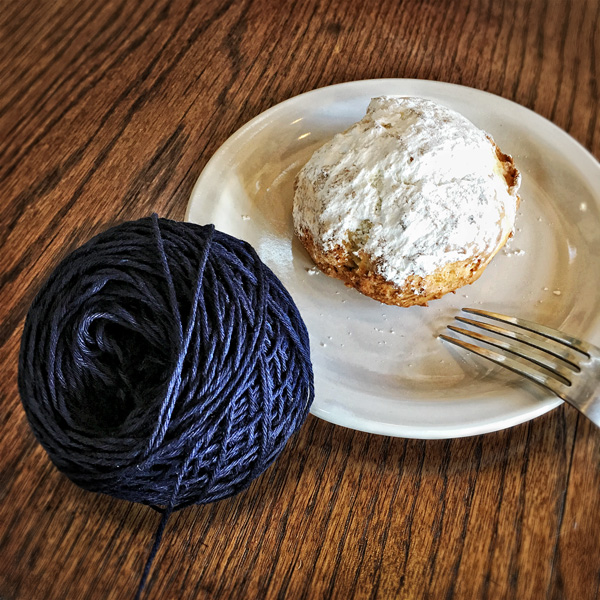
This is me not being able to resist a fabulous treat at the counter then faced with the messy reality at the table. But, OH, the sacrifices one must make for their knitting!
But I digress…
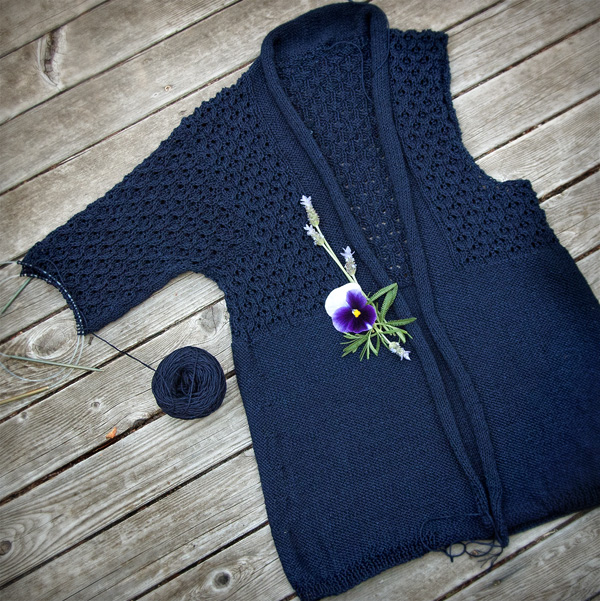
My Cerisara WIP is finally starting to look like a cardi! After another seven inches of body knitting, I cast off and am now onto the first sleeve.
Picking Up Stitches Using Indigo Yarn
Before I could get going with the sleeve knitting, I realized there was going to be a challenging step I had not considered when I started this sweater.
The Cerisara pattern is part of what I call Chic Knits’ the Sweater Organic™ series.
These sweaters all have something in common: they are seamlessly grown while knitting. All begin with an initial piece, then progressive sections are added by picking up stitches on the original section.
[[[You can see Chic Knits The Sweater Organic Bundle here.]]]
For my indigo Cerisara, the next section added, after the Body is finished, is a sleeve and it is started by picking up stitches around the armhole, then working down to the cuff, in-the-round.
However, if you recall, in compensating for the shrinkage factor of the denim yarn, I added extra length to the armhole, which now throws off the pick up ratio given by the pattern (3 sts picked up for every 4 rows worked).
How to adjust? Not too hard actually – the same principles of the initial calculation when I wrote the pattern would work here as well.
How to Determine a Pick-Up Ratio While Adding Stitches to Rows Worked
• Take number of Rows worked
• Determine number of Stitches needed
• Divide Stitches by Rows
In this case, on the first side, the armhole measured in rows to shoulder = 64 rows.
Stitches needed: 41
SO: 41 / 64 = 0.64 which is approximately 0.66 OR 2/3
(You can visually round out the above numbers to 4/6 pretty quickly which gives the same result).
Now, since this doesn’t produce the exact number of stitches the pattern calls for, some adjustment would probably (and was) necessary on the first row worked after the pick-up row.
But this was simple – in most of my Sweater Organic patterns, the first row worked is a purl row (or mostly purls) and it’s easy to p2tog (or add a stitch) as needed to achieve the needed overall beginning count.
Fabulous!
Now that I had the proper stitch count, I could get going on those sleeves.
But wait just a minute please. What about all that Sleeve Shaping in the near future?~!
THAT would be the most challenging part of the equation yet…
Coming Up in [part 5]: Real-time Shrinkage in Denim Yarn
…to be continued…
The Denim Saga
• [part 1] – About that Yarn
• [part 2] – The Sweater Awakens
• [part 3] – Knitting with Indigo Denim Yarn
• [part 4] – Picking Up Stitches using Denim Yarn
• [part 5] – Real-time Shrinkage in Denim Yarn
• [part 6] – the Final Rose – After Shrinking Denim Yarn