Like many of you, I am on the last piece of my Ribby Cardi – a Front. This piece, if you are a first time sweater knitter, might be the first time you see the esoteric and well-loved phrase *AND AT THE SAME TIME*. Want to unravel that piece of knitting code? Follow me…
YUP, it’s easier than rubbing your head and patting your tummy AT THE SAME TIME, in fact it’s easier, IMHO, than casting on or even making a button band.
When you see that phrase it is a FLAG, an indicator, that you are going to be doing two different knitting processes on the one piece you’re knitting. In the case of the Ribby Front, you are going to be shaping the armhole, then you are going to start shaping the neckline. It’s a “joined-in-progress” type of thing. First you start the Armhole Shaping and are going merrily along; and after a certain dimension or count is reached, you start the other process AND DO BOTH at the same time. Most of the time, these instructions are given as a count, so you can easily keep track of your Decreases with pen and paper or one of the various counting devices out there.
I like to use safety pins and often put one right through the completed DEC bump and then I can easily find them to count (good for lining up later to sew as well.) These are very cheap and can be found just about anywhere.
Elizabeth writes: “I am trying to do my neck decreases on my left front. Everything works fine until I get to the last five stitches. On the KAL site, you suggested doing a K3TOG at this point. So would I K1, k3tog, then k1. And on the next row, just knit the last 3 sts together? Also, does it make a difference if I do a ssk, or k3tog? For the left, as well as the right?
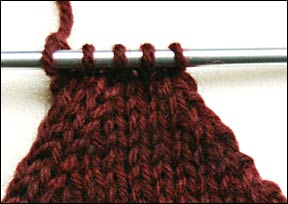
here you see the last 5 sts on my Right Ribby Front
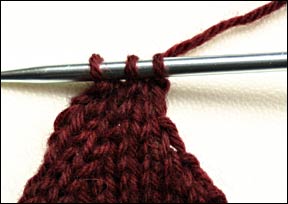
I have to decrease once for the neckline and once for the armhole. So I K1, K2TOG, then K2TOG again. If this was the Left Front, I would SSK, SSK, K1. Now I am down to 3 stitches.
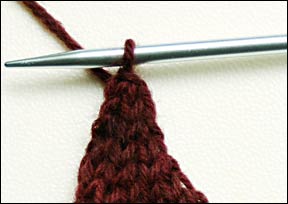
To do the last decreases, I slip the first stitch purlwise, K2TOG, then pass the slipped stitch over the stitch formed by the K2TOG (this can be abbreviated PSSO), then break the yarn and pull it through the last stitch. DONE! For the Left Front, that would be Sl 1, SSK, PSSO. Double DONE!
AND, we’ve accomplished something else that you commonly see referred to in most sweater patterns, the phrase: *Reverse All Shapings*.
I wrote Elizabeth thus:
“Reverse all shaping is easy – it really means, wherever you worked a K2tog, instead work a SSK. Wherever you bound off stitches on the RS, now bind-off on the WS.VISUALIZE this: Use the Back piece as your template (this is why you make the Back first). Put it on a flat surface and look at the armhole edges. You will be making equivalent edges on your front pieces. It is easy to see what your shaping should look like this way. Remember for the first bind-off (which would correspond to your Left Front), it was on the RS of the piece, then you finished the row. THEN, the next bind-off was on a WS row (which would correspond to the Right Front), and you finished that row.
Then the very next row, a RS row, was where you started your DECs. ALL DECs take place on RS rows. All DECs on the Left edge of the Back are K2tog. All DECs on the Right edge of the Back were SSK.
You do the same for your Left and Right pieces. That is *reverse all shapings*…
And, on the Ribby, it makes an elegant and graceful angled line on the edge of your garment.”
I hope this helps a little – I’m sure I’ve left something out but until next time…
…read the Ribby Notes here


Thanks Bonne Marie for such clear instructions! About 10 min. ago, I bound off the back of my Ribby, and am about to start the front, so this is sooo timely. I’m loving making this cardi!
-K