Whether you’re a fan of top-down or piece knitting, there’s one thing at the end of the line that everyone has to do: weave in “The Ends”.
Since I’m a fan of knotting-in new balls of yarn in the work-in-progress, there’s always a few (or many) tails fringing up the back side of my knitting. Most of the time, I’ll get a bee in my bonnet and do them as I go, because, believe it or not, they tickle the heck out of me while I’m knitting! The upside is, there is much less to do when I’m really in that “ready-to-wear-it” mode, that last phase of any knitted garmet, where I’m just itching to have some new clothes (and damn the details).
And, I’ve found a little silver in this cloud, wherein you can use those tails to do more than just join in.
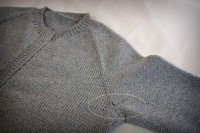
One thing that my retro-raglan has in common with every other raglan I’ve ever knit is the Gap (see picture at left above). Whether it’s top-down, like this sweater, or bottom up, there always seems to be some smallish holes around the edges where the underarm bind off happens. The stress of the first few knitted rows on any yoke cause those stitches to warp out, even use a little more yarn than, let’s say, in the middle of the row.
These really bug me. I’ve tried everything as I go along to minimize this, but have had no luck in producing a hole-free sleeve join.
So, I’ve just relaxed around the idea that this is one small adjustment that will be made in the finishing: Reinforcement.
And here’s where the tails come in. You can see in the middle picture, that where I attached the yarn to start knitting the sleeve, I’ve left a tail. Now, I’ll be honest here and admit that is one very stingy length on the tai above – usually I leave a longer one, and I recommend about a 5″ minimum tail for this type of thing. On the other side of the bind off area, when I’m done with the first area, I’ll attach a similar piece of yarn to do the same thing I’m going to do with this tail. That piece should be even longer.
And it is really easy! All you have to do is thread your darning needle and make duplicate stitches, from the backside, in the offending biggie stitches. This closes them up without an obvious “darned” look and gives strength and durability to a heavy-wear area.
Here you can see the path the yarn takes in making a duplicate stitch:
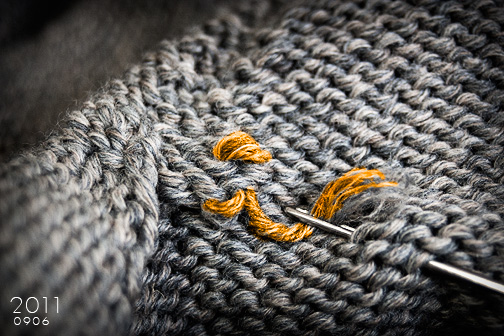
I’ve left it a little loose so your can see the loop made. It will be tightened up as needed, then that leftover tail will get woven in to adjacent stitches to become virtually invisible.
VOILA! No hole, no ends = a Two-Fer, one of my favorite kinds of things in the Universe at Large…
![]()


Very smart! I do this for sock gussets, which always seem to have a little bit of a gap at the corners.
That’s some very pretty grey/silver yarn!
Thanks, Lorette! That’s a great suggestion… :)
This is how I will get rid of those pesky holes between the fingers in the gloves I’m currently working on… Brilliant!
Are you going to publish a pattern for your retro cardigan…with simple sleeves? :) I love the look.
You and Lorette are so very very clever!! Thanks for the hint!
I’m so happy that you you posted this. Why? Because I always have a hole there too! And I always think that I have done something wrong. And it’s even nicer to know that we both fix it the same way. Works for gloves too. Can’t seem to get the fingers attached without a hole somewhere…
OMG! I am just finishing up my first top down cardi. I have those holey places at the under arm too! And here you are so timely with a solution! I think I luv you! :-)