Knitting Tips & Techniques – March 6, 2014

Knitting Tips: Chic Knits Knit Blog
v.1 How to Join Sweater Pieces to Knit in the Round using Two Circular Needles

Lately, I’ve been updating and sprucing up the Chic Knits site and it’s been a lot of fun to travel through its archives. There’s over a decade or so of blog entries wherein are many knitting tips and techniques that I still refer to for my personal knitting and when helping knitters who write to me about their Chic Knits projects. But they are hiding deep within the “stacks”. :)

Since it’s Throwback Thursday around the webz I thought it would be the perfect time to kick off the first in a Tips compilation section I’m starting to put together to have all these tasty morsels in one topical place…

First up? A Technique for Bottom-up Knitting with a Raglan Yoke.

Although there’s a lot of patterns out there for Top-Down (TD) knitting, Bottom-Up knitting is still a great technique for sweaters that incorporate stitch patterns or colorwork that is just too complicated to try and design top-down (don’t ask)…

In fact, it is still a very common, popular way to quickly knit all kinds of sweaters, both raglan, set-in and saddle.

The downside? Instead of having one large yoke piece like a TD, you first knit the body and both sleeves to the underarm and then join them altogether to form the yoke.
Problem is that the first few round/rows of the newly fashioned yoke can have some “tight spots” where the pieces meet each other, making it an awkward knitting experience.

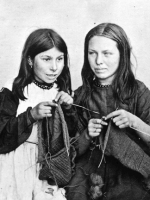
Over the years, I’ve wrestled with those rows and decided to just relax and try something different! I saw this sweet vintage picture by Lewis Harding (1870’s) of two friends knitting in the round using super-size metal “pins” and it dawned on me I could do this too.

The knitter on the right (click for larger image) appears to be knitting a sleeve and the knitter on the left seems to be knitting a tube from the bottom up. It’s their pins that caught my eye: they are not entirely straight but more like circular needles. Now this is probably from the torque the knitting put on them but it planted the seed in my brain all the same. :)

Being blessed by a large “library” of circular knitting needles it was one small step to use them in another way – if socks could soar, why not a Sweater?

++++++++++++++++++++++++++++++++++++++++++++++++++++++++++

Knitting Tips: How to Join Sweater Pieces to Knit in the Round using Two Circular Needles

When making sweaters in the round from the Bottom Up, I like to use two – medium-long circular needles to knit the body in-the-round (same concept as socks just many more stitches). Then, when it comes time to join the sleeves to the body to make the yoke, I distribute all three pieces’ stitches over two longer circular needles.
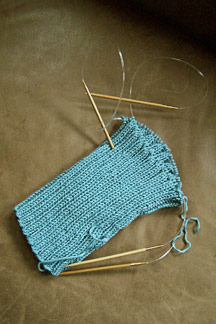
Knitting Tips: How to Join Sweater Pieces to Knit in the Round with Two Circular Needles I

You need 2 – longer circular needles in the same size as you’ve been using for the body of the sweater. First, I put half the sts of sleeve #1 on needle #1 and the other half on needle #2.
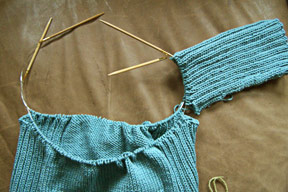
Knitting Tips: How to Join Sweater Pieces to Knit in the Round with Two Circular Needles II

Making sure I have the under-sleeve facing the underarm of the body of the sweater, I then slip one-half of the body sts to needle #1 next to the sleeve sts already there. Then I align the under-arm of Sleeve #2 with the underarm area of body section and slip one half of its stitches onto needle #1 next to the body sts. So it’s: 1/2 sts sleeve #1, 1/2 of body sts, 1/2 sts sleeve #2.
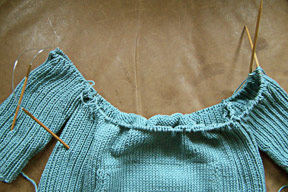
Knitting Tips: How to Join Sweater Pieces to Knit in the Round with Two Circular Needles III

Then the Back section and the other half of the sleeve stitches are distributed on the second needle in the same way for the “back half” of all pieces.

That’s it! Now those naughty large amounts of stitches are spread out over two needles, making it really easy to manage the bulk. This also eliminates the *squeeze effect* you get if you use one long circular (where the joins of the pieces are tight and awkward to work).

Smooth. We like…

…edited & refined from an entry from March 4, 2008

++++++++++++++++++++++++++++++++++++++++++++++++++++++++++

Find all of Chic Knits Knitting Tips HERE

As say not Do July 17, 2012

This summer has been a whirlwind thus far!

Lot’s of traveling, presenting, organizing, writing and sampling…

Add a heaping dose of torrid weather, and, maybe, just maybe, I have SOME kind of excuse for not being finished with this:

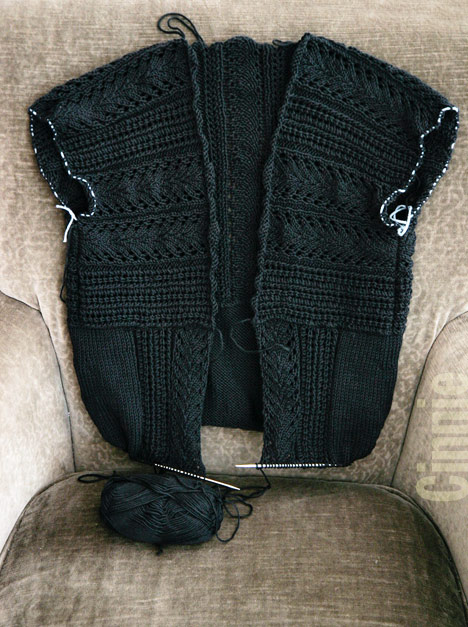
Here’s my black cotton CINNIE that I started few weeks ago.

Now, if you have the pattern, you might notice there’s something a little screwy with mine. :)

All was going really well until I started to realize something potentially embarrassing: either I’d lost a ball of yarn or horrors of horrors!

I didn’t get enough to make the project!

It would’ve been perfect to blame this discombobulation on the 100+ degree temperatures, day-after-day of screaming weather, here in the Big Windy, but no.

After a thorough hunt around the hut, and a look-up of the original sales receipt, it was all me. I simply didn’t read my own directions!

I was unoriginally (and pathetically), in a word: short.

Now comes the part that I hope you will always choose to miss: trying to rationalize HOW one can squeeze it out of what’s on hand ANY WAY.

Sidebar: this is one of the top 5 support email requests that land in my mailbox. Usually it’s fine – the knitter is off by a few yards and I can suggest a couple of quick tweaks to make it fly.

But this?

Witness my denial: this pattern includes top down sleeves. That means you can stop at any old point that you like. So, instead of following the pattern to the sleeve hem, in my confabulated state, I decided to go as far as the underarm joins, then try for the win.

The sleeve stitches were put on scrap yarn and the Body of the sweater was then next in line.

Pretzel Logic or Clown Knitting?: I figured if I could make this about an inch shorter (typical tweak to stretch low yardage) I could appraise what yarn was left to finish.

Now you can do this a few ways, but I like to weigh things.

I have a postal scale and can measure the ounces left in a partial ball pretty quickly.

Then, using the yardage on the ball band one can do some basic algebra (I love math!!) and get it going.

For instance, here’s the equation:
 
135 yds per full ball divided by 1.75 oz (in 50g) = X (where X is the unknown leftover yardage) divided by 1 oz (example weight)
 
Solving the equation for X, in this example, means there’s about 77 yds left.

And sadly, I discovered, that even with this algorithmic magic, I was not going to be able to pull it off.

SO: I decided to do what I should’ve done to begin with: get on the phone and order more yarn!

AND: get an extra ball, because now, I’m all about making some longer sleeves…

How to Fix a Flaring Edge May 29, 2012

While spring rushes to a welcome balmy end, I’ve been rushing here at Studio Chic to finish up all my loose ends for the Columbus TNNA show. (We’ll be in Booth 628)!

Whew!

I really welcomed the HOT unseasonable weather we’ve been having lately because:
– chance to hunker in the AC and work & play
– chance to wear new clothes to shield myself from said AC, especially in public places

The new little Silky Wool CINNIE has been getting a workout. It’s so lightweight, I just throw it in my bag — an easy Take Along.

But the same reason I love it is the same reason it’s been annoying.

Lightweight. Hmm.

Chic Knits CinnieIf you’ve been knitting for any length of time, you know just because a yarn is a certain *weight*, it doesn’t mean all types thusly marked have an equivalent drape or wear.

Depending on the fiber content, different strands can yield fabrics that have little in common except for dimension.

This cardi is a great case in point.

The original cotton/microfiber sample I made has quite a bit of body to its fabric.

The turquoise Silky Wool in contrast is very light, more delicate.

And its ribbing wasn’t quite behaving the way I wanted. The very bottom hem edge wanted to point outward a little, flaring, if you will.

So, it was time for an old couture dressmaking trick. ;p

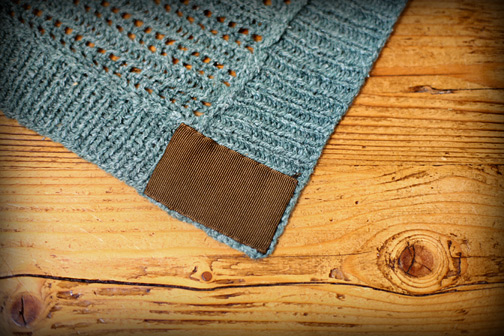
Although I wasn’t going to actually sew a chain to a jacket hem (ala Chanel) or insert pennies or even paper clips, I did decide to use some grosgrain ribbon to face the bottom edge, the idea being it would make that area slightly *heavier* so it would then naturally hang down more gracefully.

This would add enough weight and bulk to make my *jacket* behave.

Here’s how I did it:

How to Fix a Flaring Edge

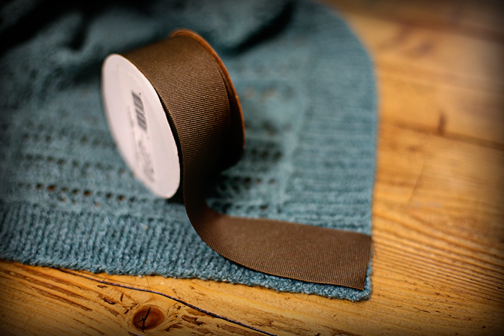
1. Get some ribbon! I chose some 1 1/2″ wide grosgrain ribbon in a rich brown. This was the closet color they had to my yarn. Even though it doesn’t match, the tone is approximated the same and it will Recede into the background when worn.

How to Fix a Flaring Edge

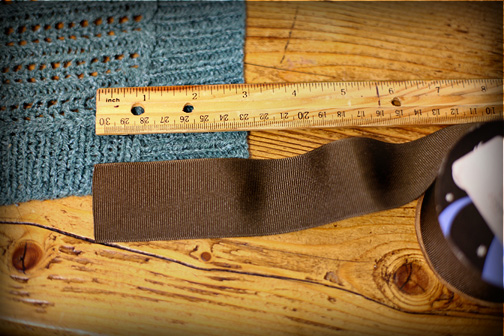
2. Measure off the ribbon. I wanted this to slightly overlap the edge ribbing into the hem ribbing with about 1/4″ on either end to fold inside to prevent raveling.

How to Fix a Flaring Edge

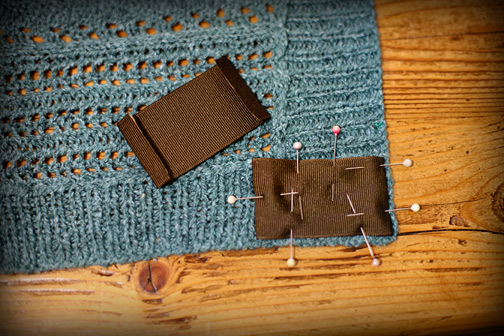
3. Prepare the facing. I had my steam iron up and running for some other sample blocking so I folded in the cut ends of my ribbon pieces and lightly steamed. THIS is very helpful to make the ribbon behave nicely and SPEEDS UP your stitching. I’m all about the quick draw over here – make it NICE but make it FAST! It also makes it easier to place and then PIN the piece to the edge you are reinforcing.

How to Fix a Flaring Edge

4. Stitch to the garment. Using a matching thread, I hem-stitched the facing to the ribbing.

How to Fix a Flaring Edge

VOILA! With a little effort, I now have a LIGHT sweater that also wears well. :)